

Set up your account
Organization, teams, API keys, and billing
Send traffic
Models, routing, fallback, BYOK, and coding tools
Secure your data
Data retention, logging, and redaction
Monitor usage and activity
Logs, errors, audit log, and alerts
Go to production
Best practices, capacity, cost, and latency
Launch checklist
Everything in one list
Set up your account
Every account starts as a personal account. For a company, create an organization: it holds a shared balance, members, teams, and API keys. Switch between your personal account and your organizations from the account menu at the bottom of the sidebar.Create your organization
1
Create it
Open the account menu at the bottom of the sidebar, click Create an Organization, enter the organization name, and click Create Organization.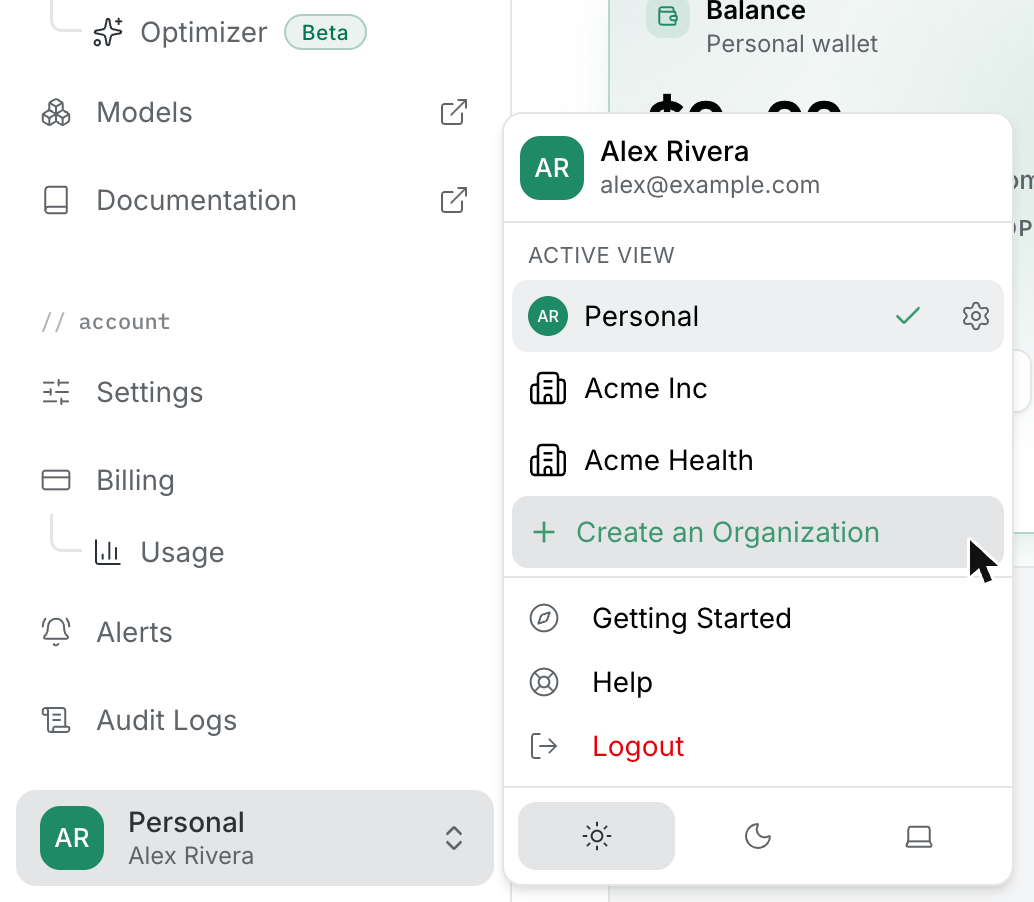
2
Invite your team
Go to Members, click Invite Member, enter one or more email addresses, choose a role for each person, and click Send Invitation. Only Owners can choose a role other than the default; Admins invite with the default role.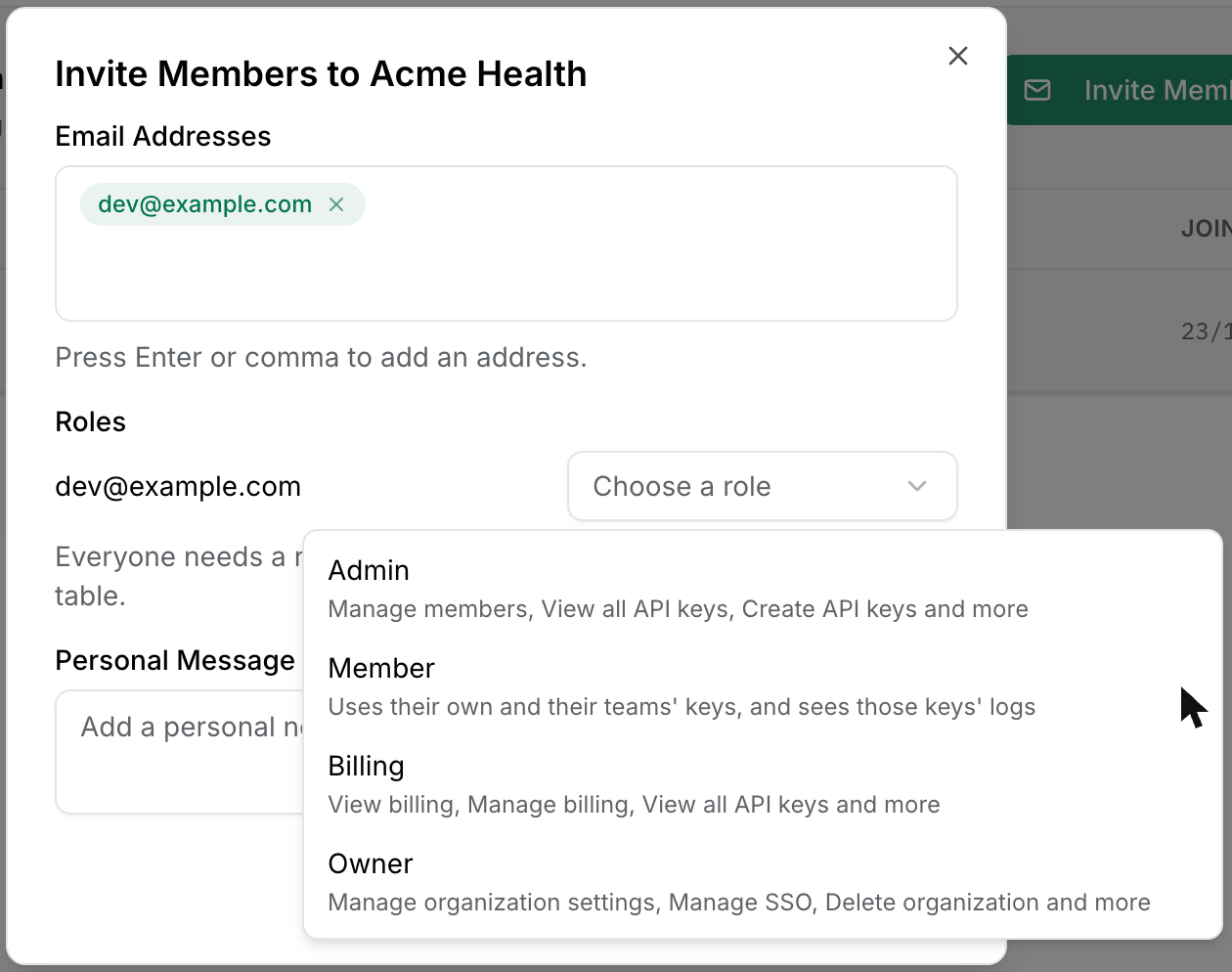
Create teams
Teams group people and API keys, for example by department (engineering, product, marketing, HR), by environment (production, development), or by workload. A team can have its own spend limits, rate limits, routing, and data retention settings, and new keys on the team start from those settings.1
Create a team
Go to Teams and click Create Team (Create your first team if you have none). Enter a name, optionally add members, and set the team’s limits and settings. Owners and Admins can create teams.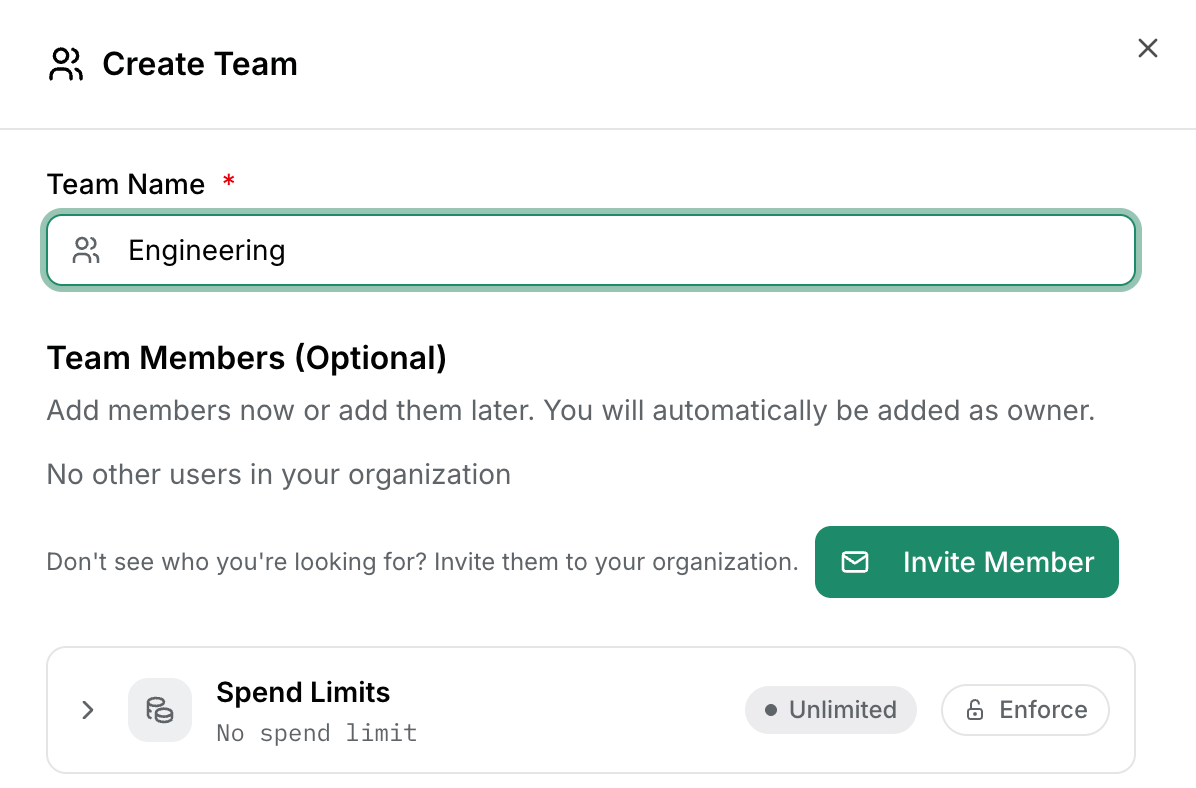
2
Add people
Open the team’s Members tab, pick the people to add, and click Add to team.
Create API keys
Create a separate key for each environment and major workload, so you can limit, monitor, and revoke each one on its own.1
Create the key
Go to API Keys and click Create key. Give it a name and, in an organization, choose its Owner: the organization or one of your teams. The owner can’t be changed later.To give someone temporary access, such as a contractor or a candidate on a work trial, set an Expiration Date. The key stops working after that date. Leave it empty and the key never expires.
2
Set its limits and settings
The key starts with a copy of its owner’s settings. Adjust them for this key: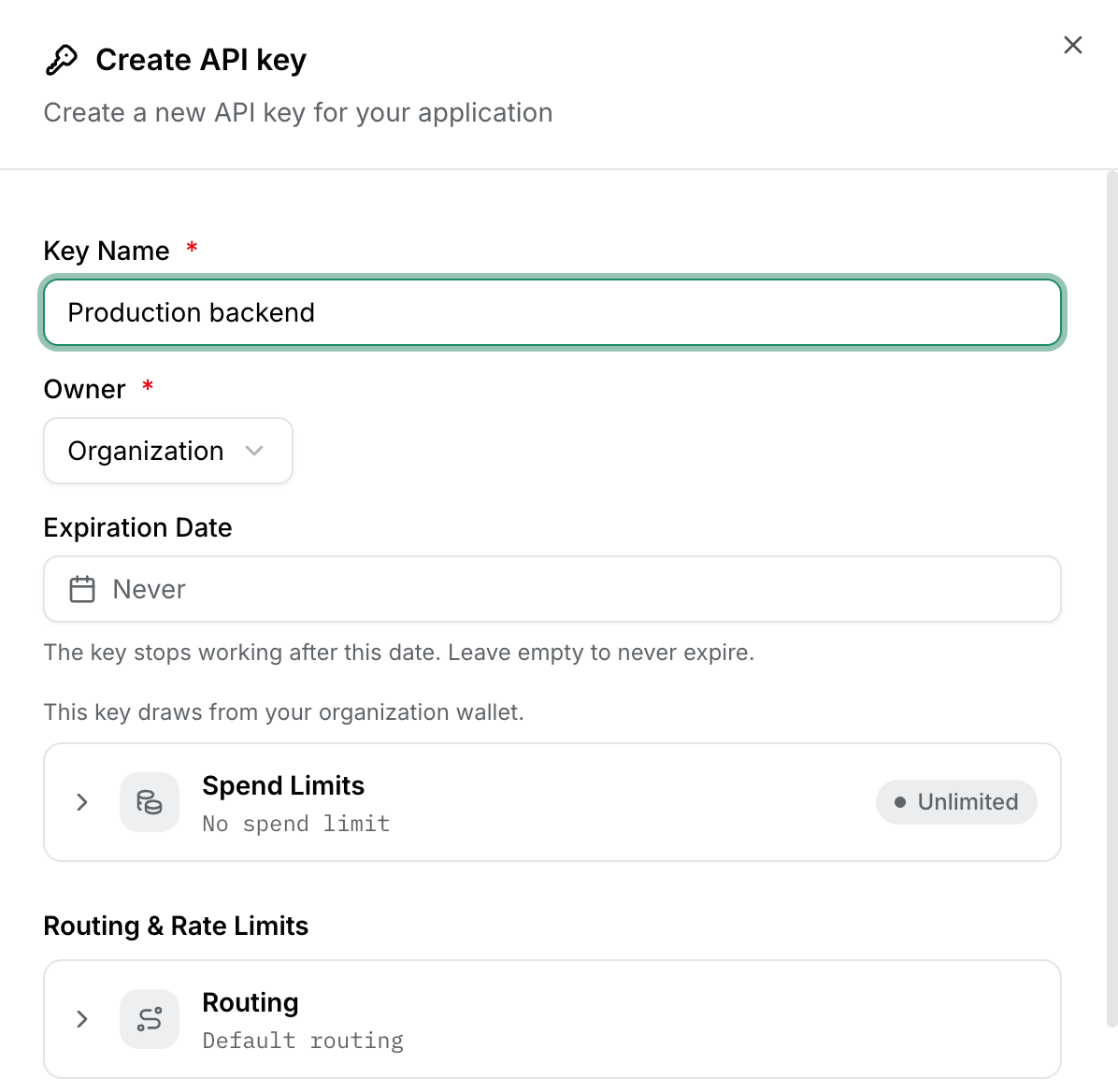
- Spend Limits: a Total Spend Limit that never renews, and a Recurring Spend Limit that renews daily, weekly, monthly, or every N days.
- Routing & Rate Limits: preferred, allowed, and blocked models and providers, plus tokens-per-minute and requests-per-minute limits, overall or per model.
- Data Retention: Zero Data Retention and request logging. See Secure your data.
3
Copy the key
Copy the key right away. You won’t be able to see it again.
Owners can Enforce a setting for the whole organization in Settings, and team managers for a team in the team’s Settings tab. Enforced Zero Data Retention and logging are locked on every key underneath. Enforced routing, rate limits, and spend limits become a ceiling that keys can tighten but not loosen.
Add credits and auto top-up
Requests are paid from your prepaid balance (except BYOK traffic, which your provider bills directly). Owners and members with the Billing role can manage billing.1
Buy credits
Go to Billing, click Buy Credits, enter an amount, and click Continue to Payment.
2
Turn on email or text notifications
Automatic top-up needs a way to reach you. Switch to your personal account from the account menu, open Settings, and under Notifications turn on email or text notifications.
3
Turn on automatic top-up
On the Billing page, click Set up next to automatic top-up. Add a payment card, turn on the switch, set When balance drops below (at least $5) and Add this much (at least $25, and no less than the threshold), and click Turn on.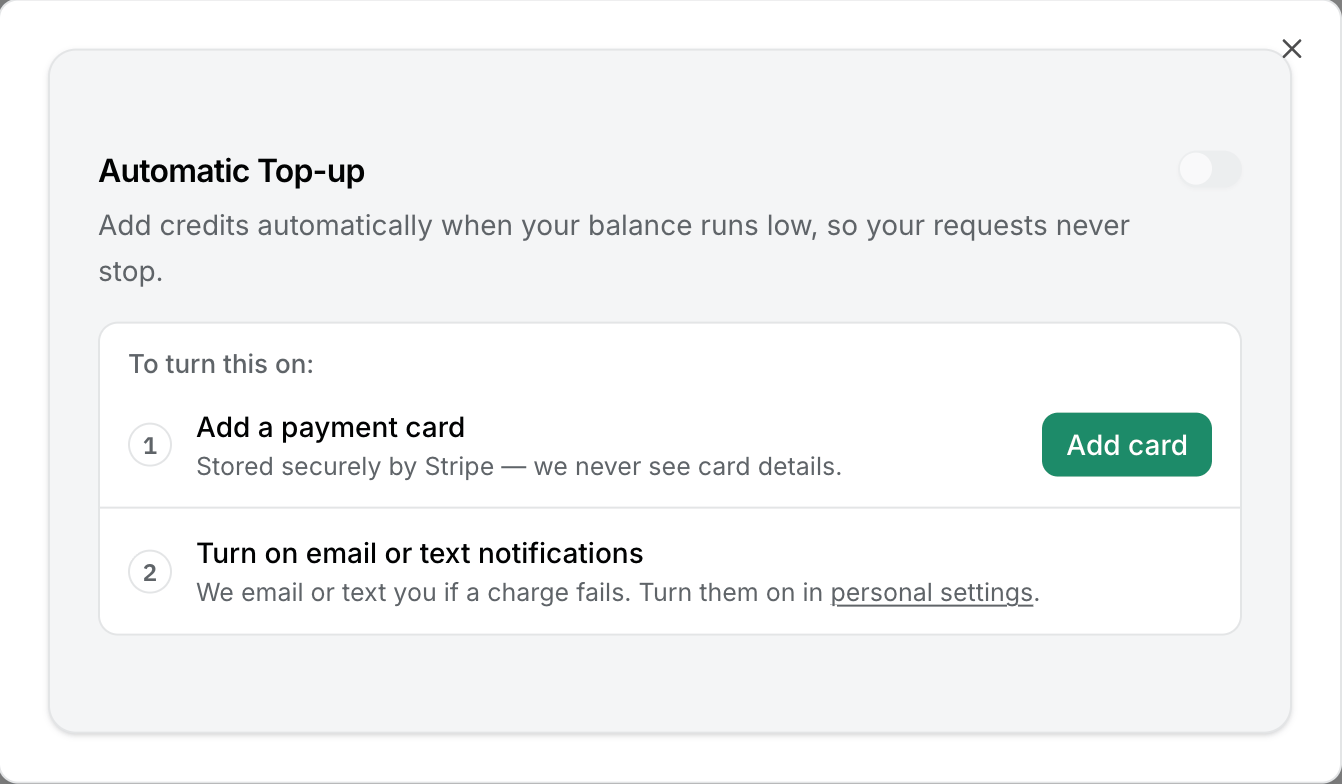
Send traffic
Use the Responses API and OpenAI format
Concentrate is OpenAI-compatible, so keep your code in the standard OpenAI format and point it at Concentrate. We recommend the OpenAI SDK with the Responses API (/v1/responses). The Quickstart has copy-paste examples.
Already on Chat Completions or the Anthropic Messages format? Both work too: see Chat Completions and Messages.
Choose models with model slugs
Themodel field accepts three forms:
Find every slug, with pricing and the providers that serve it, on the models page or from
GET /v1/models.
Routing and fallback
Most models are served by more than one provider. When you send a model slug, Concentrate picks a provider for each request and fails over when one has a problem:- Match. Only providers that support the essentials your request uses (streaming, tools, structured output, and so on) are considered. Optional parameters a provider can’t honor, such as sampling settings, may be dropped rather than failing the request.
- Rank. Providers you list in
routing.provider.fallbackscome first, in your order, then providers you hold a BYOK key for, then the rest, ordered by yourrouting.provider.sortpreference (performanceby default). - Fall back. If a provider is degraded, rate-limited, or unavailable, the request moves to the next provider serving the same model instead of failing. For streaming requests, fallback happens only if a provider fails before its stream starts.
routing object to it:
provider/model request doesn’t fall back to other providers unless routing.provider.fallbacks or routing.provider.whitelist is set, on the request or on the key.
Auto routing & fallback covers every option.
Bring your own keys (BYOK)
If you have credits with OpenAI, Anthropic, AWS Bedrock, Google Vertex, Azure, or another provider, add those keys to Concentrate. Requests routed to that provider then run on your key:- Your provider bills you directly, so nothing is taken from your Concentrate balance.
- Your Concentrate token limits don’t apply, only your provider’s. Your requests-per-minute limits still do.
- Usage still appears in your logs and dashboard, marked as BYOK.
1
Open BYOK
Go to BYOK in the dashboard. Keys you add while viewing your organization apply to the whole organization. Only Owners, or roles granted Manage provider keys, can manage them.
2
Add a key
Pick a provider, enter a name and the credential, and click Save key.
Use coding tools
Claude Code, Codex, OpenCode, and Pi all run on Concentrate. The Concentrate CLI (beta) sets them up with one command and doesn’t change the tools’ own settings:cn isn’t found after installing, add ~/.local/bin to your PATH with the line the installer printed, then open a new terminal.
Setting up Claude Code without the CLI:
- Run the setup script from the Claude Code guide.
- If you were logged in to Anthropic in Claude Code before, run
/logoutfirst. - Run
/statusin Claude Code. It should showhttps://api.concentrate.aias the API endpoint.
Secure your data
Zero Data Retention and request logging
Both are set per API key, and can be enforced across a team or your whole organization.- Zero Data Retention (ZDR) sends requests only to providers that support zero data retention. ZDR belongs to a model-and-provider pair, so turning it on means fewer providers are available for some models.
- Request logging is off by default. Turn it on to store each request’s prompt and response so you can read them in Logs when debugging. Every request’s status, tokens, latency, and cost appear in Logs either way. The Model Optimizer also needs logging on, because it tests models on the prompts and responses in your logs.
1
Per key
Go to API Keys, create or edit a key, and under Data Retention set Zero Data Retention (Providers) and Enable customer-controlled logs.
2
Across the organization (optional)
As an Owner, go to Settings in your organization. Under Data Retention, click Enforce on Zero Data Retention, Logging, or both, confirm, and click Save changes. Enforced settings are locked on every key in the organization.
"zdr": { "enabled": true } in the request body. See Zero Data Retention & Logging.
Guardrails and redaction
Guardrails mask sensitive data, such as personal, payment, health, and credential data, automatically on every request made with a key.1
Open Guardrails
Go to Guardrails in the dashboard and select an API key.
2
Configure redaction
Enable redaction, choose the target (
input, output, or both), and select the entity types to redact. Save your changes.Monitor usage and activity
Logs, errors, and the dashboard
- Dashboard shows your spend, requests, tokens, and errors, plus your balance if your role can view billing.
- Logs lists every request you have access to, with its status, model, key, tokens, and cost. Filter by date, status, model, provider, or key, open a request to see its details, or export to CSV. Request and response content is shown only for keys with logging turned on.
- Errors (under Logs in the sidebar) shows failed requests across all your keys: the error rate, the most common errors, and whether they concentrate on one key, model, or provider.
Audit log
Audit Logs records who created, changed, or deleted keys, teams, users, BYOK keys, and other settings. Owners see the whole organization’s log by default; everyone else sees their own actions.Alerts
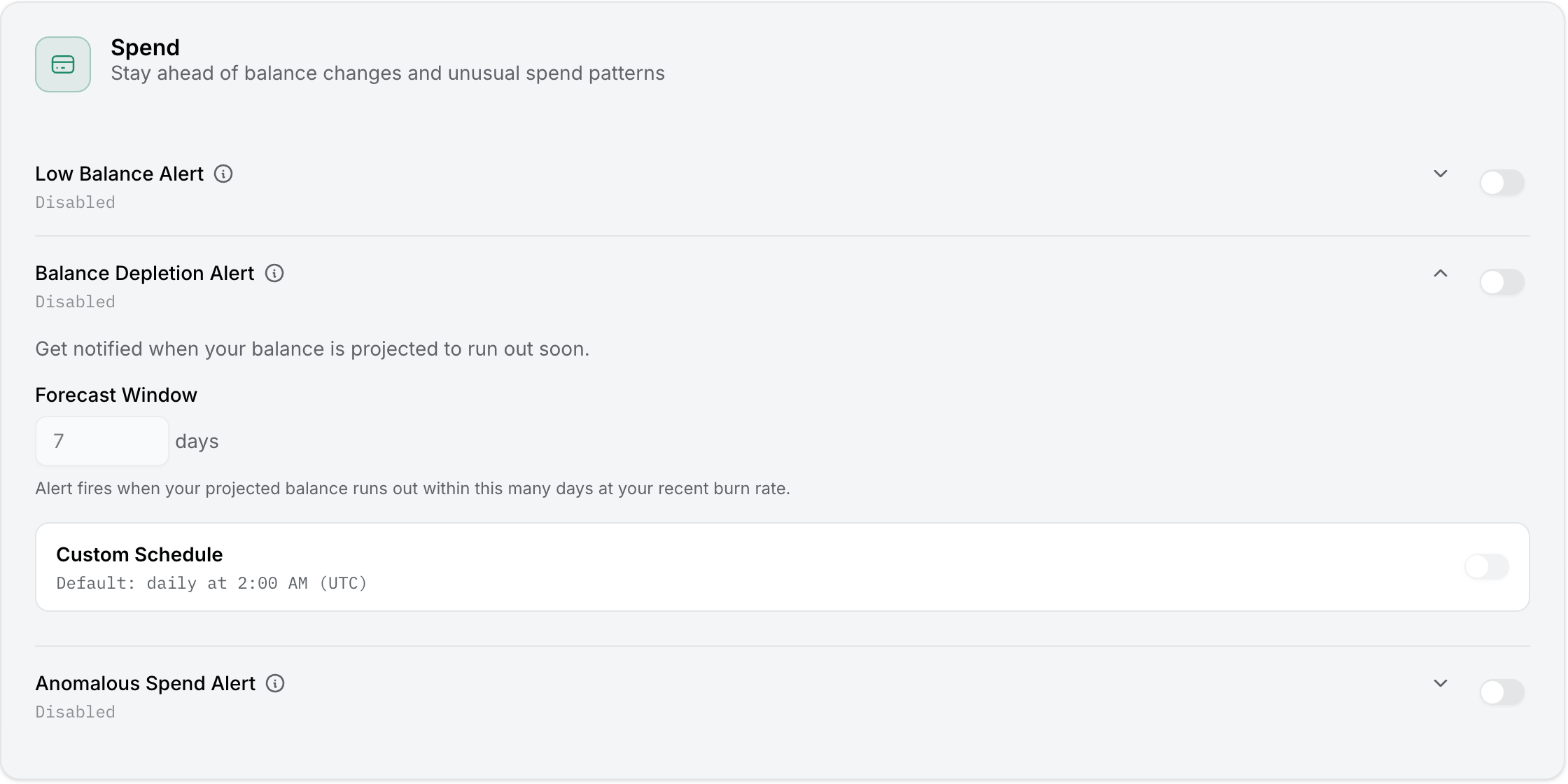
Alerts flag something that needs attention on your dashboard, and by email or text if you turn on notifications. Turn these on before you ramp up:
Set them up on the Alerts page. Alerts reach you by email or text, which you turn on in your personal account’s Settings, under Notifications.
Go to production
Build for production
Read your key from the environment
Read your key from the environment
Never hardcode API keys or commit them to version control.
Cap response length
Cap response length
Set
max_output_tokens to limit response length and cost:Retry with backoff
Retry with backoff
Concentrate already fails over between providers, but your client should still retry
424, 429, 500, 503, and 504 responses with exponential backoff. When a Retry-After header is present, wait at least that long. A 504 may have been partly processed upstream, so check before retrying work that shouldn’t run twice. Don’t retry other 4xx errors: fix the request instead.See Errors for every status code.Track usage and cost
Track usage and cost
Every response includes token
usage and its cost, so you can track spend per request. For BYOK requests, cost.byok is true and the cost isn’t charged to your balance.Plan capacity with us
See your current rate limits in the dashboard under Routing & Rate Limits. If you need more capacity, contact support and we’ll work with you to raise your limits.- Before you launch, tell us your expected TPM and RPM, your mix of frontier and open-source models, which models you’ll use, and how bursty your traffic is.
- Once your limits are raised and you need much higher capacity, ramp very large workloads gradually, adding 10–25M TPM every 5–10 minutes, rather than going from zero to 100M+ TPM at once.
Optimize cost and latency
Model Optimizer (beta)
Find cheaper models for the jobs your agents repeat, tested on your own conversations
Prompt caching
Reuse cached prompts to cut cost and latency
Service tiers
Trade cost against latency with
flex, priority, and fastWeb search
Native provider search, or our Exa integration for any model
Launch checklist
Before you send production traffic:- Your organization is created, with one Owner and everyone else as Admins, Billing, or Members
- Separate API keys for production, development, and each major workload, each with a spend limit, and an expiration date on temporary keys
- Credits added and automatic top-up turned on
- Requests send model slugs, not
provider/model, unless you have a reason to pin - BYOK keys added for any provider you have credits with
- Zero Data Retention, logging, and redaction set where you need them
- Low balance, balance depletion, key exhaustion, and error rate spike alerts turned on
- Your code reads the key from the environment, sets
max_output_tokens, and retries424,429,500,503, and504 - For large workloads: capacity planned with us, and a gradual ramp-up